[OLD] Configure ACES Exchange in Mail (Mac OSX 10.6x)
NOTE – This article refers to the old ACES Exchange system. If you are on CITES Excahnge 2010, please use the settings for your email client in this CITES article. At this time, we recommend that all all Mac users use Outlook 2011 to check their Exchange email.
1. Click the Mail icon in the Dock.
Note: If you are launching Mail for the first time, it prompts you to set up an account. If you already have an account in Mail and wish to add another account, open the Mail application and follow the menu path Mail > Preferences > Accounts, then click on the + (plus) sign in the lower-left corner.
2. Enter the following information in the initial Welcome to Mail window:
- The Full Name field contains the name from your Mac OS X user account; you may change it if you wish.
- In the Email Address field, enter your @illinois.edu address.
- Enter your password.
Note: Your password for Mail will be stored in your Mac OS X Keychain.
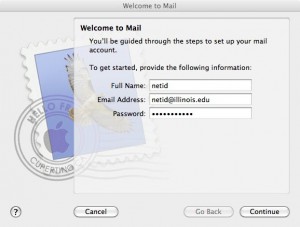 (Fig. 1)
3. Click Continue.
4. In the Incoming Mail Server window, enter the following configuration settings:
- On the Account Type pop-up menu select Exchange 2007.
- For Description enter ACES Exchange.
- For Incoming Mail Server, enter exchange.aces.uiuc.edu
- For the Username, enter your NetID.
- The Password field is automatically filled in.
- If synching Address Book and iCal, keep the Address Book contacts and iCal calendars checked.
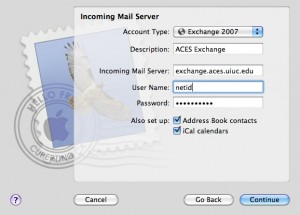 (Fig. 2)
5. Click Continue.
6. In the Incoming Mail Security window, if not already checked, click to check Use Secure Sockets Layer (SSL).
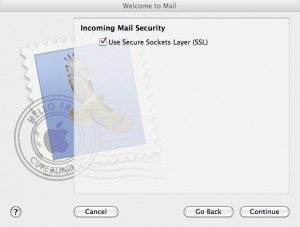 (Fig. 3)
7. Click Continue.
8. In the Account summary window, if not already checked, check the Take account online box.
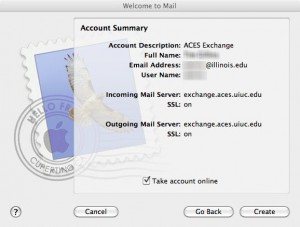 (Fig. 4)
9. Click Create.
Note:Your ACES Exchange account should now be configured. We will now configure the UIUC Campus Directory.
1. Add the campus LDAP server to enable Mail to access the UIUC Campus directory.
In Mail, follow the menu path Mail > Preferences.
2. Select the Composing tab.
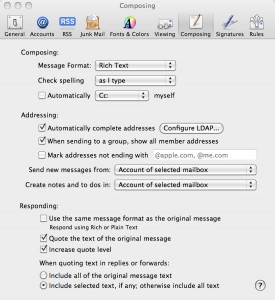 (Fig. 5)
3. Click the Configure LDAP button under Addressing.
4. Click the + (plus) button.
5. In the Server Info dialog box, enter the following:
- For Name, enter UIUC Campus Directory.
- For Server, enter ldap.uiuc.edu.
- For Search Base, enter dc=uiuc,dc=edu (do not include any spaces).
- Leave the other fields with their default settings.
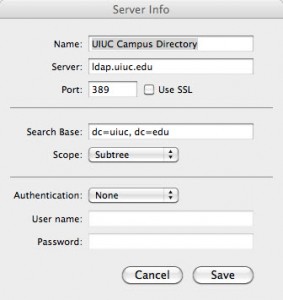 (fig. 6)
6. Click Save.
7. Click Done.
8. Close the Preferences window.
Note: The UIUC Campus Directory is now installed and your email should be fully functional.
Print Article
