[OLD] Configure ACES Exchange in Entourage 2008
NOTE – This article refers to the old ACES Exchange system. If you are on CITES Excahnge 2010, please use the settings for your email client in this CITES article.
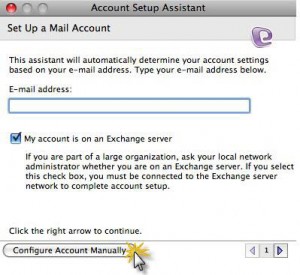
1. Open Entourage. the Entourage Setup Assistant will automatically launch.
Note– If you already have an account configured through Entourage, you will need to select the Entourage menu after launch, select Account Settings…., and select the New icon.
2. Next, Click the Configure Account Manually button.
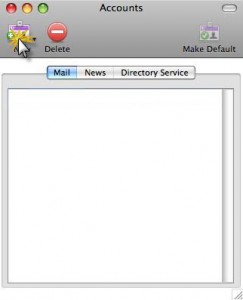
3. Go to the Entourage menu and select Account Settings….
4. Click New.
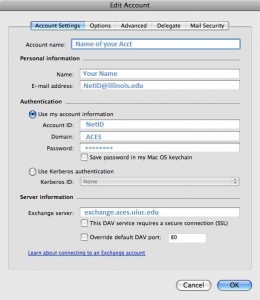
5. Select the Account Settings tab, and enter the following information:
- the Account Name: field, you can enter whatever you would like to.
- Enter your name in the Your name: field.
- Enter your email address in E-mail address: field. *NOTE-Your email address is NETID@illinois.edu.
- In the E-mail address: field, type your email address.
- Enter your NetID in the Account ID: field.
- Enter ACES in Domain: field.
- Enter your password in Password: field. *Optional-Check the Save password in Mac OS keychain box.
- Enter exhange.aces.uiuc.edu in the Exchange Server: box.
- Check the box: This DAV service requires a secure connection(SSL)
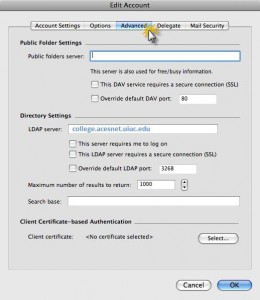
6. Next, select the Advanced tab, and enter the following information:
- In the LDAP Server: field, enter college.acesnet.uiuc.edu
7. Click OK.
Your ACES Exchange account should now be properly configured in Entourage. You will now need to configure the UIUC Campus Directory LDAP
1. Start Entourage 2008.
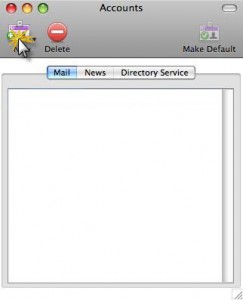
2. Click on the Tools menu and select Accounts.
3. In the Accounts window, click on the Directory Service tab.
4. Click the New button.
5. If the Account Setup Assistant appears, press the button labeled Configure account manually.
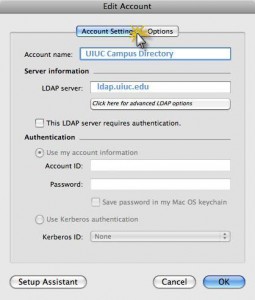
6. On the Edit Account window, in the Account Name field, enter UIUC Campus Directory.
7. In the LDAP Server field, enter ldap.uiuc.edu
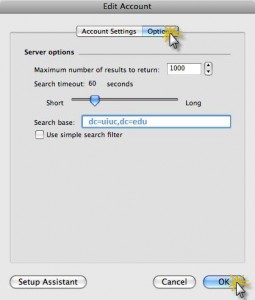
8. Click on the Options tab.
9. Under the Options tab, in the field labeled Search base, enter dc=uiuc,dc=edu and click OK.
Your campus LDAP should now be configured correctly.
Print Article

