Managing groups in my.ACES portal
Add ACES Utilities content item (one time step)
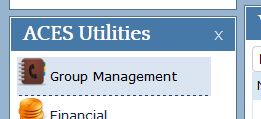
The “ACES Utilities” portal content item (portlet) is necessary to manage groups. Groups are often used for internal e-mail lists.
After logging into my.ACES (https://my.aces.illinois.edu), scroll to the bottom of the narrow column and select “ACES Utilities” from the “Add content” pulldown menu:
Click on the “Add” button below the menu to add the portlet. It should now show up on your my.ACES page.
Manage groups
When logged into my.ACES, select the “Group Management” item from the ACES Utilities portlet.
This will bring up the Group Manager Mode window. Choose Groups.
This will reveal the Group Manager window. Groups are listed in the upper area, members in the lower area.
To start, search for the group you want to edit. NOTE: use an asterisk (*) in front of any keyword.
Ex. *adv will find any group with the letters “adv” in it, including “aces_advancement” and “advancement_mbx_full.”
To add a new member, search for their NetID in the right-hand side and then drag and drop them to the list of group members.
NOTE: You can remove existing group members by reversing this: drag and drop them from the left-hand list to the right.
NOTE: If the person is in a college other then ACES, select the overlapping circle button to select the college that they are in.
After making the appropriate changes, click the “Save” button to commit the changes.
The group manager can be closed by clicking the X in the upper right of the window.
Print Article


